News
How to Split Large PST File into Smaller Parts of All Outlook Versions?

Personal Storage Table (PST) file – a data file format for Outlook POP3 accounts, that contains various mailbox items, such as email messages, calendars, and contacts. Continuously using it over a period of time causes it to become large or reach the maximum size limits defined by Microsoft. With a large or oversized PST (Personal Storage Table), users can encounter several problems. Some of these are:
- Slow performance of the Outlook client
- Outlook unable to store new email messages or any other items
- PST file corruption
- Errors messages like “The file pst has reached its maximum size”
To prevent such issues from occurring, users can split a PST file into smaller parts. This post covers the benefits of splitting an oversized PST file and the ways to do so. We will also discuss a stepwise procedure to use a specialized PST splitter tool to split large PST file.
What are the Microsoft-Defined PST File Size Limits?
Here are some reasons why you should split a large/oversized PST file into smaller parts:
| Outlook Version | PST File Size Limit |
| Outlook 97 and Outlook 2002 | 2 GB |
| Outlook 2003 and 2007 | 20 GB |
| Outlook 2010 and later | 50 GB |
Why to Split Oversized PST Files?
Here are some benefits of splitting a large/oversized PST file into smaller parts:
- Smaller files help improve the overall performance of Outlook
- It helps reduce the risk of file corruption or data loss
- Smaller PST files are easy to share with other Outlook users or to transfer to cloud storage or other devices for backup
- It helps organize emails and other items in an efficient way, e.g., – By Date, By email ID, By Folder, and more.
Methods to Split Large PST File into Multiple Smaller Parts
Now, let’s have a look at some easy ways to split oversized PST file.
Method 1: Split PST using Outlook Import/Export Wizard in Outlook
If you have a single large PST file, you can use MS Outlook’s Import/Export wizard – a built-in utility that can be used to export mailbox items to PST file/s. Use it as a workaround and export the required emails, mailbox folders/items to PST files, thereby splitting the large file into smaller parts. Let’s see how:
- Launch Outlook on your Windows PC.
- Click on File and go to Open & Export > Import/Export.
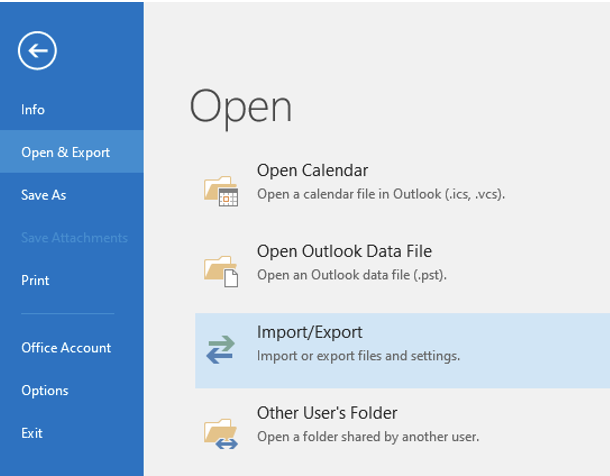
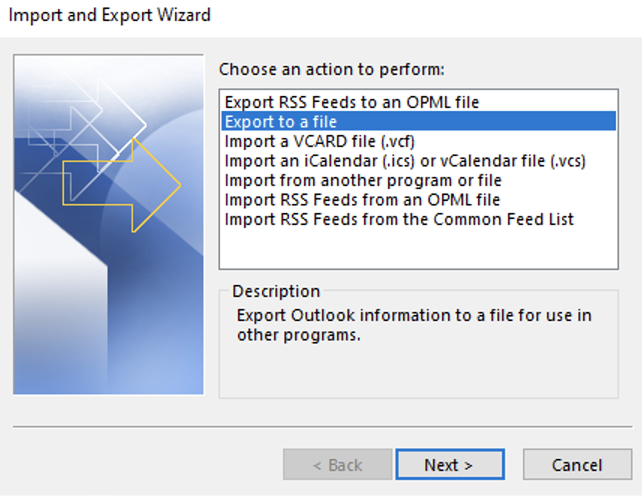
- The Import and Export wizard will open.
- Select the Export to a file option > Next.
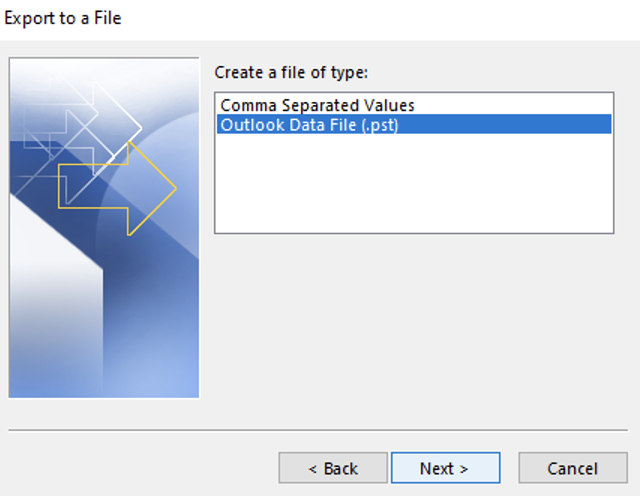
- Now, choose Outlook Data File (.pst). Click on Next.
- Select the items/folders you want to save in a new PST file. Click Next.
- Browse and select the destination folder in the new PST file.
- Click Finish to begin exporting.
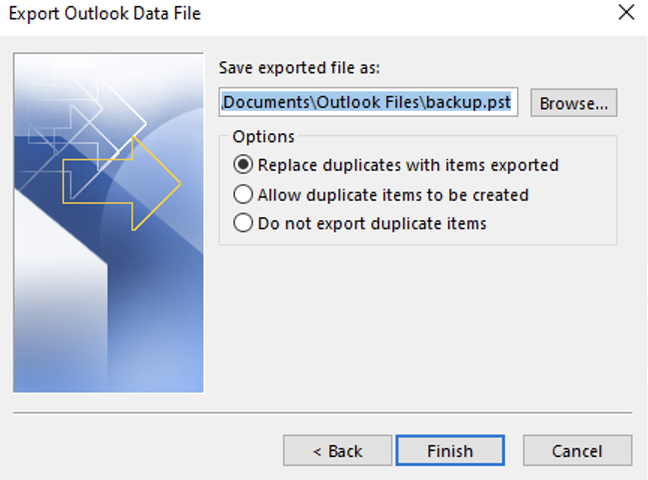
Repeat the above procedure to create multiple PST files.
Note: This won’t reduce the size of your PST file. For that, you will need to delete the exported items from it.
Method 2: Split PST using Outlook Archive Option
MS Outlook has another feature called “Archive” or “AutoArchive.” Though it primarily moves older mail items from your mailbox (.pst file) to a separate archive file (PST) on your local storage, it can be used as a workaround to reduce PST file size. Follow the steps below to use this to split PST files:
Note: If this is not available, either it is disabled by the admin or your account is configured with an Exchange Server.
- In Windows Outlook, go to File > Info > Tools > Clean up old items.
Note: If you’re using Outlook 2013, click File > Info > Cleanup Tools > Archive.
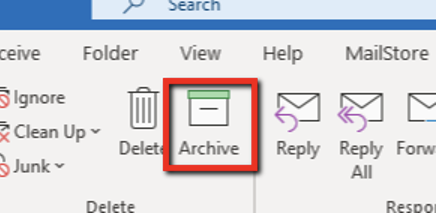
- Select the required folder/s and enter the date. Select the Include items with “Do not AutoArchive” checked option.
- Select the mailbox folder/s that you want to archive.
- Enter the date against the Archive items older than option.
- Select the Include items with “DO not AutoArchive” checked option.
- Click on OK.
The selected folders/items will be moved to a new PST file. You can repeat the steps to move more items to different PST files. This way, you can split your PST file data based on date ranges.
Method 3: Split PST by Moving Items to a New PST File
Another way to split PST file into smaller parts is to create a new PST file in Outlook. Then move some data from the source PST file into it. Here is what to do:
- Launch Outlook desktop client.
- Click on Home > New Items from the ribbon.
- Go to More Items and select Outlook Data File.
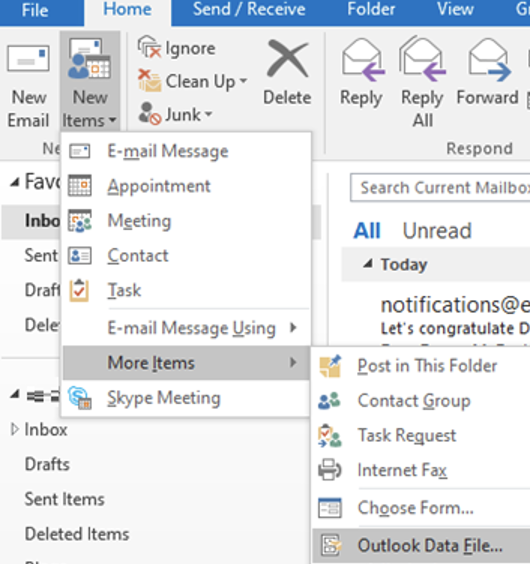
- The Create or Open Outlook Data File window will appear.
- Select the location/folder where you want to save the new PST file on the system.
- Give the file a name and click on OK. The newly created PST file will be listed in the left pane in your Outlook.
- Now, select the items you want to move and drag and drop them into the new file.
Repeat the above steps to create more PST files to move other mailbox items.
Limitations of the Manual Workarounds
The workarounds we discussed above have some limitations. These are listed below:
- Time-consuming and tedious, as users are required to repeat steps to create multiple PST files for different mailbox items
- High chances of missing mailbox items due to human errors
- Not suitable for splitting multiple large PST files at once
- Work only when Outlook is installed and an email account is configured in it
Is there a Simple Way to Split PST File into Smaller Parts?
A third-party PST splitter software makes it simple to split a PST file. One such tool is Stellar Splitter for Outlook – a powerful desktop application, which can efficiently split large PST files into smaller parts, depending on the criteria, like size, date, email ID, etc., selected by the user.
Here is a quick look at its key features:
- Split large/oversized PST files into smaller files effortlessly
- Split PST files based on date, size, email address, etc.
- Doesn’t modify the mailbox structure in the resulting files
- Create a batch to split multiple PST files in a single operation
- Supports PST files of different versions of Outlook – 2021, 2019, 2016, 2013, and earlier.
Now, let’s see how this software works:
- Download Stellar Splitter for Outlook from its official website. Install it.
- Launch it.
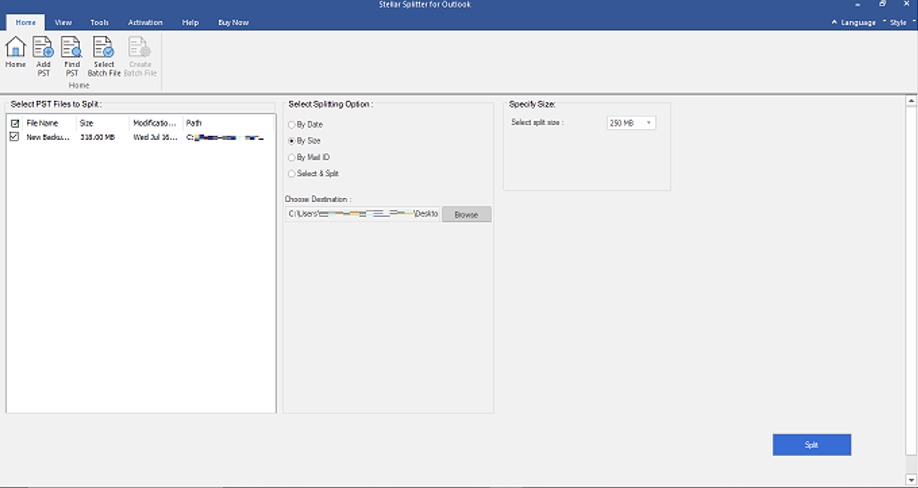
- Click on Add PST in the ribbon. Alternatively, drag and drop the large PST file into the software.
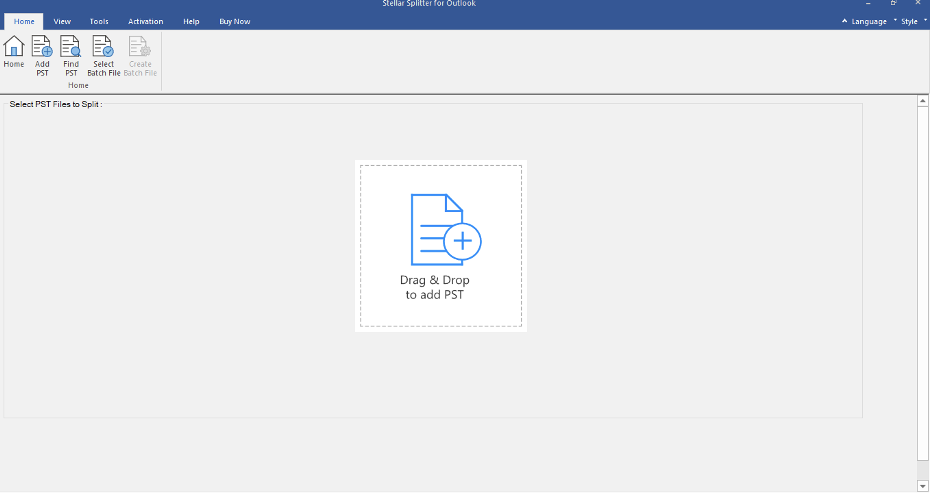
- On the next screen, choose the Splitting Option – By Date, By Size, or By Mail ID.
- Next, click Browse under the Splitting Options section to choose a destination path to save the split PST files.
- Click on Split and wait for the software to split the selected PST file based on the chosen criteria.
- After the process is complete, you will see the Split Complete dialog box. Click OK.
What to Choose: Manual Methods vs Specialized PST Splitter Tool
Here is a comparison between the manual methods and the PST splitter tool.
| Feature | Manual Methods | PST Splitter Tool |
| Split by Size | No option available | Split large PST file/s based on different sizes, such as 5 GB, 10 GB, 20 GB, etc. |
| Split by Date/Year | Archive option lets you split items by selecting the Items Older Than option. | Option to split PST file based on specific Date Range. |
| Speed | Slow. Depends upon the number of mailboxes and folders. | Quickly split the selected PST file based on the chosen criteria, irrespective of the file size. |
| Scope | Ideal for splitting single PST file. | Split large or multiple PST files. |
Conclusion
An oversized or large .pst file not only causes performance issues but also other problems in Outlook. Moreover, it is also prone to corruption and integrity issues.
Here, we learned how to split a large PST file and how it helps prevent corruption and various other issues. The manual workarounds above should help you to split a PST file. However, they are not suitable for a large number of PST files. For that, you can rely on Stellar Splitter for Outlook – a powerful tool that lets you securely split PST file(s) into multiple parts and according to different criteria, with complete data integrity.




-

 Resources5 years ago
Why Companies Must Adopt Digital Documents
-

 Resources4 years ago
A Guide to Pickleball: The Latest, Greatest Sport You Might Not Know, But Should!
-

 Resources1 year ago
50 Best AI Free Tools in 2025 (Tried & Tested)
-

 Resources1 year ago
Get Paid $5000+ a month to write : Discover 30 Spectacular Websites That Reward Your Writing Effort